Back in May I offered a tantalising glimpse of my next DIY project, which were a set of custom-made alcove shelves. In the two and a half months that have passed since then, you have probably thought about little else.
It’s not yet time to show you the final result – not when I can wring another post out of this story – but it is time to update you on scribing, a new skill I had to acquire as part of this project that would let me cut pieces very precisely to fit the contours of my old house’s wobbly walls.
Scribing, let me tell you now, is a bastard.
Scribing against a wobbly wall is sort of OK, though the tool I bought for the job having watched a whole series of tedious YouTube videos was a waste of time and I did all my wobbly wall scribing by just pressing the wood against the wall, straightening it up with a spirit level and then running a pencil down the wall to draw a line on it. I sometimes had to do a second cut to get it right but that wasn’t too hard.
The thing they don’t tell you is about scribing the skirting boards. For the first one I had to do, I got my scribing tool out again and discovered it was unable to get into all the crevices of our fiddly skirting boards, so I had to improvise. Then I cut my piece of wood like this.
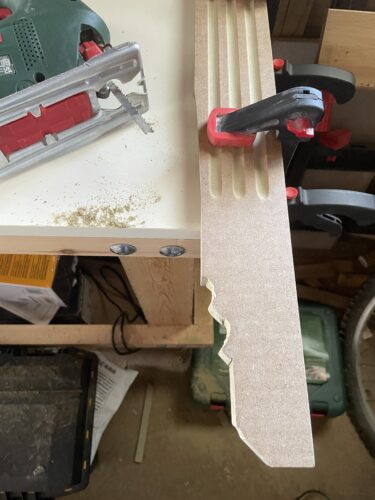
I don’t mind telling you that I was pretty pleased with that.
Then I took it back into the house and it didn’t fit. Like, it didn’t even nearly fit. It didn’t fit at all. It looked like it was made for a different house altogether. So I marked it where there were still bits of wood in the way and I cut those off and brought it back and it still didn’t fit. I repeated this process about four times. In the end I cut it almost smooth and then filled in all the gaps with caulk.
Never mind. First go. The next one will be better.
By the time I did the next one I’d prized a bit of skirting board off the wall, so I could now use that as a template. I put it up against the wood, drew round it, cut along the line, got a perfect outline of the skirting board. Tested it by slotting in my little template piece and found it fit perfectly.
Then I took it back in the house and it didn’t fit. It didn’t even nearly fit. It didn’t fit at all. Somehow, despite it clearly being a cut that would accommodate exactly the right type of skirting board, it still didn’t go. So I swore at it and chopped a load more bits off and hammered it in and filled the gaps with caulk.
It turns out that scribing is a mug’s game. You don’t need to precisely cut everything with millimetre precision, nor can you. I can’t, anyway, and to make myself feel better I’ve come to believe that nobody can. It’s impossible. I have reached the conclusion that scribing is a conspiracy to sell you stupid plastic tools that don’t work. No, what you need to do is cut it vaguely right, and then fill all the gaps with caulk, and then you paint it, after which the join will be invisible and nobody will care. Scribing can go to hell.
The other bit of faffy woodwork I had to do was accommodate a plug socket that – due to some optimistic measuring at the design stage – was concealed by the cabinet but was so close to the front that it was in the way of the woodwork. I solved this problem with chiselling.
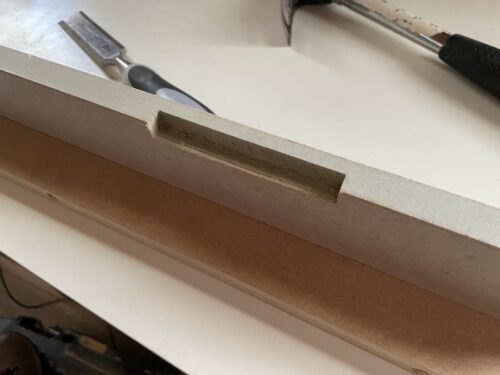
I’ve done chiselling before and I like it. I did it again here, and I liked it again. A snug little cut-out was made so that the wood and the socket didn’t get in each other’s way and it all worked nicely first time. Chiselling is great.
So there you go: screw scribing and hooray for chiselling. Join us next time for the thrilling conclusion of… cabinet saga!
10 comments on “Cabinet saga, part 2”
This all sounds frustrating. I don’t know why you keep doing this to yourself. Perhaps Kate would like to take a pop at scribing some wood shafts.
No, Kate’s busy filling the garden with food. Everything in the garden is now edible, including the decking. My place is inside, scribing the wood shafts and sanding the pelmets.
Play to your strengths, okay I get it. What about the doggo? Surely they could get involved with the scribe-o and sand-o wood shaft pelmet action-o?
No, the doggo shows no interesto in woodworko. It’s just me-o. But that’s OK. I’m going to post part 3 soon and you’ll see how it all turned out despite the doggo’s indifference-o.
I DECLARE THIS OLD NEWS!
NOW!
Still it would have been nice if she’d contributed something, like the time she helped you open that present I sent you in the post.
She contributes a lot, it’s just that she leaves woodworking to me. I think both Kate and the doggo understand that woodwork is a man’s job, and as a manly man’s man, full of testosterone and toxic masculinity, I have to do it all. It’s not something they can ever be involved in.
That’s so true. I forgot that very important angle. Sorry mate.
If you’ve got the skills now, why not rustle up something for the little woman? Some kind of kitchen cabinet or some hooks to hang all the aprons and other womanly items on?
By “little woman” I choose to assume you mean the dog because there is no way that referring to Kate as “the little woman” will end well.
The dog doesn’t need to hang up any aprons.