Do you need to cake? If your loved one is celebrating a birthday, wedding, divorce or bar mitzvah, you might need to cake. Nobody – and this, I must remind you, is the law – can celebrate properly without cake.
What I’m saying is that you almost certainly need to cake. But how do you cake? Don’t worry. I will tell you.
Here is a simple step-by-step caking recipe, complete with pictures.
1: Gather ingredients
You will need flour, sugar, eggs, loads of other things, and every bowl you own. If you do not own many bowls, try asking friends and neighbours if they can lend you some bowls. The main thing you will need is bowls.
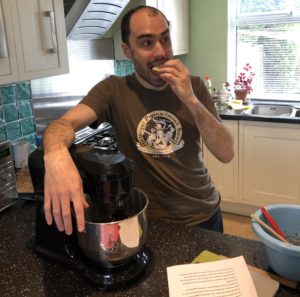
Assemble your ingredients (as shown above) and weigh them. Weighing things is important. Put everything on the scales. This is a good way of finding out in advance how much cake you will end up with.
2: Mix ingredients together
Put all the ingredients together in a big bowl, except some of them, because you will need some of them later. Mix them. Doing this yourself is very boring, so ideally, get a machine that will do it for you while you have lunch.
You will need to mix all the cake things until they form a sort of thick sludge. As a reference, aim for a light slurry the colour and texture of something you might dredge out of a canal in a part of the country with clay-based soil.
3: Bake cake mixture
Everything you have done so far is literally worthless without the baking part, so this is important. Put the cake mixture in the oven and – I cannot stress this enough – make sure the oven is on. Then leave it alone for half an hour or something.
Your cake slop will turn into actual cake via the gift of heat.
4. Mix more ingredients together
If you have been following this recipe closely, you will still have some ingredients left that you didn’t mix together in step 2. Mix those ingredients together now and, if your cake is still hot, put the resulting mix in the fridge for a bit.
Don’t leave it in the fridge for too long or you will end up with something resembling cement, not that I’d know because that definitely didn’t happen.
5. Assemble the components
Think of your cake as a sort of elaborate sandwich or perhaps an educational model depicting layers of sedimentary rock or alluvial silt. You will, in other words, need to take the things you have mixed and combine them in layers. Gradually form a tall pile of cake parts as neatly as you can.
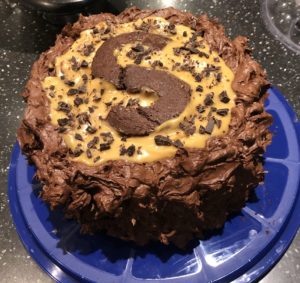
In the example below, the letter “S” has been made from extra cake parts and positioned on the top. “S” is short for “Satisfactory” and indicates that this cake has passed its mandatory quality control inspection.
6. Apply uncooked stuff to the cooked bits
Now take all the remaining cake mix, which was not cooked in the oven and also not left in the fridge for so long it took on the texture of cement, and smear it all over the pile of cake.
Voila! You have now caked. Congratulations. You will naturally feel like celebrating and should begin festivities at once.
You’re welcome.


14 comments on “How to cake”
That cake looks amazing. I’d guess from your simple instructions that this is something that one could hope to achieve in about an hour or two, can you confirm if this is the case?
What happens if you don’t leave the cake alone when it’s in the oven? What if you keep opening the door and asking if they want a cup of tea?
Yes, this type of caking can be knocked out in an hour. That’s assuming you already have enough ingredients and bowls, and that you remember to preheat the oven.
If you keep hassling the cake while it’s cooking it will get annoyed and taste bitter when you eat it.
What, even with good intentions? What happens if you mix them in when caking up the cake? Does it taste any sweeter then?
How do you mix good intentions into cake mixture? Please detail step by step exactly what substance you are adding and how it is combined with the cake mix.
1. Rustle up some good intentions.
2. Throw them into the cake mix.
3. Fuck about with them for a bit.
4. Mix, cake, bake and serve.
Sounds legit to me.
I see. Yes. That’s much clearer to me now. The cake would indeed be sweeter if you did that, but it would also cause extensive rust formation in nearby metal objects.
I’m looking forward to this.
When are you sending it to me?
There’s a problem with that, which is that I ate it. What I suggest you do is follow the instructions yourself, and – if you start right now – you could have a cake exactly like this in about 90 minutes’ time.
Why would you do that, Chris? What did you gain by smearing this sadness over the world?
Because it was delicious, and because I live a life of sheer hedonism, existing only from one moment to the next, never thinking about the consequences, only doing what feels right in the moment and being the most essential and instinctive version of myself that I can possibly be, and also because I hate you.
I always knew you hated me.
Also YOLO.
“YOLO indeed, sir. YOLO indeed.”
– Gandhi